You probably don’t know that most commercial water damage gets worse in the first 24 hours because trapped moisture spreads into walls, insulation, and equipment. You need to act fast, but you also need a methodical process that protects people, limits loss, and speeds recovery. The right remediation steps can prevent hidden damage, mold growth, and costly downtime, and the next move matters more than you might expect.
Key Takeaways
- Shut off the water source, isolate the area, and protect electronics, documents, and equipment immediately.
- Assess the water type, structural damage, and electrical hazards before starting remediation.
- Extract standing water quickly with pumps or wet vacs, then dry surfaces using air movers and dehumidifiers.
- Remove unsalvageable materials, disinfect hard surfaces, and follow proper contact times and ventilation requirements.
- Document all damage, moisture readings, and repair needs to support insurance claims and restoration planning.
Shut Off the Water and Protect Assets
First, shut off the water at the main valve to stop additional damage, then isolate the affected area if you can do so safely.
Use proven water shutoff techniques: verify the valve location in advance, turn it fully clockwise, and confirm the flow has stopped at fixtures. If your building has zone valves, close them to limit spread.
Next, protect assets with asset protection strategies that your team can execute fast. Move electronics, documents, inventory, and portable equipment to dry space. Elevate what can’t be moved on pallets or shelving. Cover remaining items with plastic only after you’ve stopped active leaks.
Keep your crew informed, assign roles, and document what you’ve secured. Acting quickly helps your whole team stay organized and recover faster.
Assess the Damage and Safety Risks
First, identify the water source so you can determine whether the intrusion is clean, gray, or black water and plan the right response.
Next, inspect the structure for sagging ceilings, warped flooring, compromised walls, and other load-bearing hazards before you enter or begin removal work.
Then check electrical safety by de-energizing affected circuits and verifying that outlets, panels, and equipment aren’t exposed to moisture.
Identify Water Source
Before you start cleanup, identify the water source and stop it if you can safely do so, because the type of intrusion determines both the damage path and the health risks. You’ll protect your team when you classify the source fast and document what you find.
Use leak detection to trace plumbing, HVAC, roof, or appliance failures, then perform a moisture assessment to map spread into materials and adjacent spaces.
- Confirm the source type: clean, gray, or contaminated.
- Isolate supply valves or affected equipment.
- Record the source location, time, and extent.
- Notify your response team so everyone acts from the same plan.
When you know the origin, you can prioritize drying, limit secondary losses, and keep your crew aligned on the safest next step.
Inspect Structural Hazards
With the water source controlled, inspect the structure for hazards before anyone begins cleanup. You should walk the affected areas slowly, looking for sagging ceilings, bowed walls, warped floors, and cracked framing that signal loss of structural integrity.
Use hazard identification to mark unsafe zones, and keep your crew out of any area that feels unstable or shifts underfoot. Check load-bearing members, stairways, and roof sections for visible deflection, rot, or separation at joints.
Remove only loose debris that won’t disturb the structure, and document every condition you find for the remediation plan. If damage looks extensive, bring in a qualified structural professional before work continues.
Acting together with a clear safety standard helps protect your team and keeps the project moving with confidence.
Check Electrical Safety
Next, check electrical safety before you move equipment or start drying operations. You need to treat every wet circuit as energized until verified otherwise. Shut off power at the main disconnect, then schedule electrical inspections with a licensed electrician before re-entry.
Follow these safety protocols to protect your team and keep the job moving:
- Test outlets, panels, and cords for moisture, corrosion, and heat.
- Tag and isolate damaged equipment immediately.
- Remove standing water near live systems before power restoration.
- Document all findings and clear only approved circuits.
If you work with the right crew, you’ll reduce shock risk, limit downtime, and keep the remediation site controlled.
Clear communication helps everyone stay aligned and confident.
Extract Standing Water Quickly
You need to extract standing water immediately with high-capacity pumps, wet vacs, and truck-mounted extraction units to reduce saturation time.
Use rapid extraction methods in a systematic pattern so you can remove water from carpets, subfloors, and low points before it migrates deeper into materials.
Fast removal limits secondary damage such as structural swelling, microbial growth, and electrical hazards.
Rapid Extraction Methods
Rapid extraction is the first critical step when standing water accumulates after a commercial loss, because every minute increases saturation, material breakdown, and microbial risk.
You can protect your team and your facility by following disciplined emergency protocols and using advanced equipment built for high-volume removal.
- Perform moisture mapping to target hidden pockets.
- Deploy safety gear before entry and keep staff training current.
- Use pumps, truck-mounted vacuums, and ventilation techniques to speed drying.
- Document conditions for insurance considerations, then track the restoration timeline closely.
You’ll work faster when equipment maintenance stays on schedule and disaster preparedness plans are clear.
In a trusted recovery crew, everyone knows their role, communicates cleanly, and extracts water with precision.
Prevent Secondary Damage
Once standing water is located and the source is controlled, remove it immediately to limit swelling, staining, delamination, and microbial growth.
You should deploy pumps, wet vacs, and squeegees fast, then verify hidden moisture with meters. This is where moisture control protects your facility and keeps your team aligned.
Add water sensors in low points so you catch leaks early, and tie results into restoration planning. During emergency preparedness reviews, confirm drainage solutions work, floor drains stay clear, and shutoff access remains open.
You’ll also strengthen preventative maintenance through routine building inspections, which reduce repeat losses. Document every action for insurance coverage, because detailed records speed claims and support recovery.
Acting quickly helps your crew prevent secondary damage and return to normal operations with confidence.
Dry the Building and Contents Thoroughly
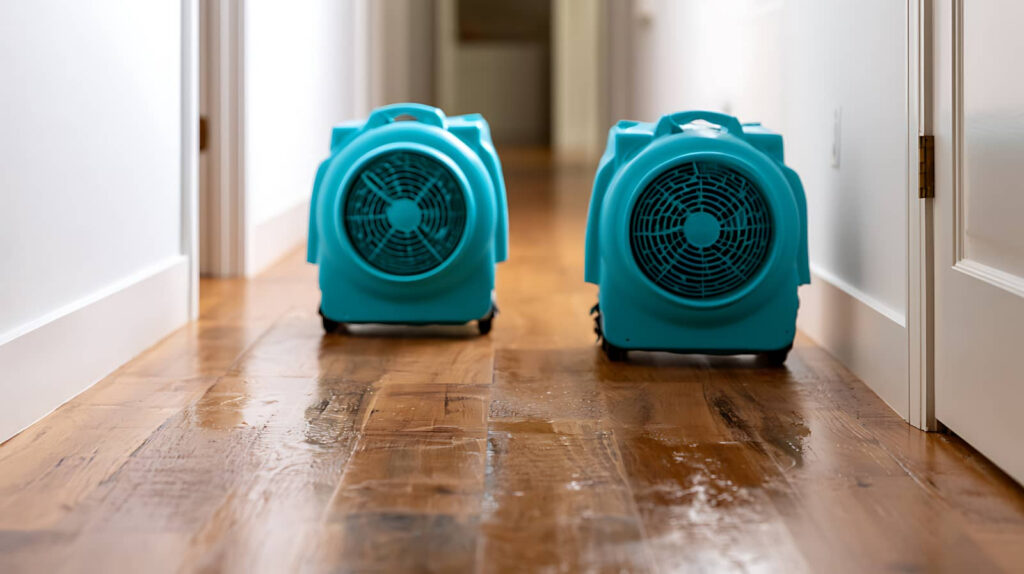
Drying the structure and contents thoroughly is critical to prevent hidden moisture from driving mold growth, material deterioration, and secondary damage. You need to run dehumidifiers, direct air circulation techniques, and verify progress with moisture detection tools so you’re not guessing.
Keep the building’s HVAC strategy coordinated and monitor temperature, relative humidity, and wet materials until readings normalize.
- Position air movers to sweep across damp surfaces.
- Use dehumidifiers sized for the affected volume.
- Check wall cavities, flooring, and furnishings with moisture detection tools.
- Log readings twice daily and adjust drying equipment as needed.
When you stay disciplined, you protect your team’s workspace and keep everyone aligned around a clean, safe recovery.
Remove Damaged Materials and Salvage Contents
After the building and contents are dry enough to evaluate safely, you can begin removing materials that can’t be restored and separating items that still have salvage value.
Work room by room, tag items, and document each decision before you move anything. Use salvage techniques such as careful dismantling, palletizing, and protective wrapping to keep recoverable assets organized and intact.
Pack electronics, records, and furnishings by category so your team can track ownership and condition.
For material disposal, follow local rules for debris, saturated insulation, damaged drywall, and contaminated contents. Load waste promptly to clear work zones and reduce handling errors.
When you coordinate with your crew, you’ll protect value, speed recovery, and keep the site moving toward a clean, controlled restart.
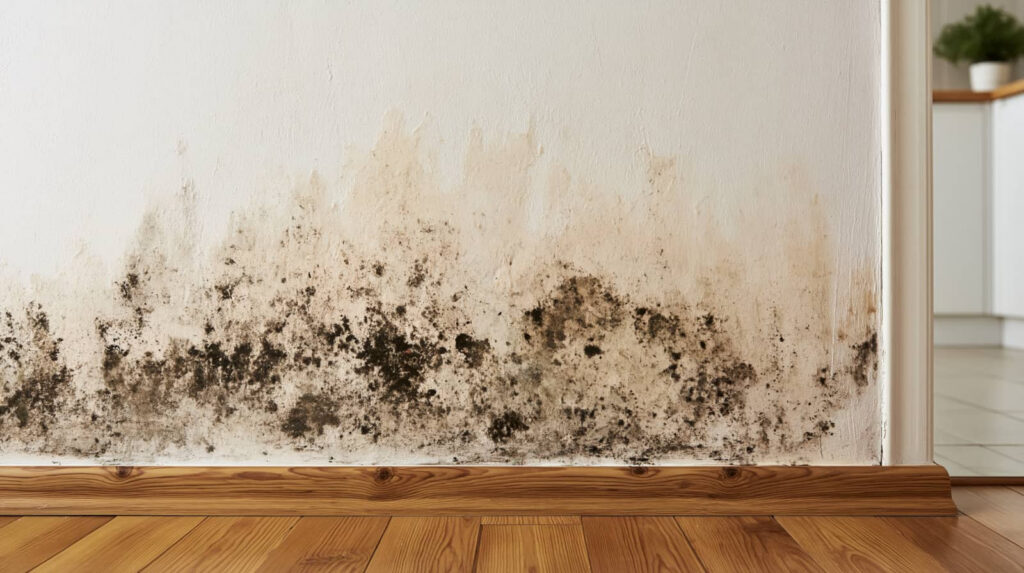
Disinfect Affected Areas and Prevent Mold
Before you disinfect, verify that all wet materials are removed and the area is dry enough to treat safely. You’ll protect your team and cut mold growth risk by using proven disinfecting techniques on hard, nonporous surfaces.
Follow site-approved chemical directions, maintain proper contact time, and keep ventilation running so residues don’t linger. Wear gloves, eye protection, and a respirator if aerosols may form.
- Clean visible dirt first.
- Apply disinfectant evenly.
- Keep the surface wet for the full dwell time.
- Recheck hidden spaces like baseboards and corners.
Your crew should act methodically and stay consistent. When you work together with discipline, you create a healthier, safer space and reduce the chance that moisture problems return.
Document Losses and Plan Repairs
Once the area is stabilized, you should document every loss in detail so you can plan repairs accurately and support insurance claims.
Photograph damaged walls, flooring, equipment, and inventory from multiple angles, and record moisture readings, dates, and room locations.
Create a clear itemized list that separates salvageable materials from items that need replacement, so your team can move fast with confidence.
Share this evidence with your adjuster and contractor to align scopes, reduce disputes, and keep restoration budgets realistic.
Then prioritize repairs by safety, business interruption, and code requirements.
Keep copies of invoices, estimates, and communication logs in one shared file so everyone stays coordinated.
When you track the facts now, you protect your operation and strengthen your recovery.
Frequently Asked Questions
How Do I Choose a Commercial Water Damage Contractor?
Choose a contractor with verified contractor qualifications, 24/7 response, and clear project timelines. You should check insurance, certifications, equipment, and references. Ask for a written scope, then pick the team that communicates confidently and reliably.
What Insurance Documents Should I Collect After Flooding?
Collect your flood insurance policy, declarations, claim forms, adjuster notes, repair estimates, photos, receipts, and loss inventory. You’ll speed the claims process, strengthen your proof, and stay connected with your insurer’s requirements.
How Long Does Commercial Remediation Usually Take?
Usually, you’ll see a remediation timeline of 3-10 days, like crews clearing a flooded corridor. You’ll move through restoration phases fast if drying starts early, damage stays contained, and you coordinate access, docs, and approvals.
Can Operations Continue During Water Damage Cleanup?
You can sometimes keep operations running if you isolate affected areas, follow emergency procedures, and protect staff safety. You’ll need ventilation, dehumidification, and clear access. Coordinate closely with remediation pros to limit downtime and prevent contamination.
What Permits Are Needed for Major Restoration Work?
You’ll usually need building, electrical, plumbing, and possibly mechanical permits; restoration regulations can make paperwork feel endless. You should check permit requirements with your local authority before you start major work, or you’ll risk shutdowns.
Final Thoughts
When you move quickly and follow a clear remediation plan, you limit losses and get the building back online faster. Shut down the source, extract water, dry every affected area, and remove compromised materials before they spread damage. Disinfect surfaces, monitor for mold, and document everything for repair planning. Think of the process as resetting a control system: each step restores stability, reduces risk, and helps you return to safe, reliable operation.