When disaster strikes and water engulfs your property, how prepared are you to tackle the aftermath? Immediate action is vital to prevent mold growth, which can quickly become a serious issue. You’ll need to take specific mold remediation steps to safeguard your home and health. From removing standing water to knowing when to call in professionals, understanding these essential tips can make all the difference. Let’s explore what you should do next.
Key Takeaways
- Remove standing water within 24-48 hours to prevent mold growth using pumps and wet vacuums while wearing protective gear.
- Discard soaked materials like carpets and drywall to inhibit mold proliferation after flooding.
- Enhance ventilation by opening windows and using fans, and deploy dehumidifiers to reduce humidity levels.
- Clean affected surfaces with a water-detergent mixture, then apply suitable disinfectants and mold inhibitors to prevent future growth.
- Regularly inspect for mold resurgence and monitor humidity levels, seeking professional help for extensive or persistent mold issues.
What to Do Immediately After Flooding
When flooding occurs, it’s essential to act quickly to minimize mold growth and damage. Start by removing standing water within 24-48 hours to prevent mold proliferation. Use pumps and wet vacuums, ensuring you wear protective gear.
Next, remove soaked materials like carpets and drywall, as they can harbor mold.
Document the damage thoroughly for your insurance claims; take photos and list affected items. This documentation is important for a smooth flood recovery process.
Once the area is cleared, ventilate by opening windows and using fans to dry out the space efficiently. Finally, consider using dehumidifiers to maintain low humidity levels, inhibiting mold growth.
Prioritize Safety: Protect Yourself First
When addressing mold, your safety is paramount. Always wear appropriate protective gear, including masks and gloves, to minimize exposure.
Before proceeding, assess the structural stability of your environment, and evacuate if you notice any hazards.
Wear Protective Gear
As you prepare to tackle mold remediation, prioritizing your safety by wearing appropriate protective gear is vital.
Start with protective clothing, such as long-sleeved shirts, pants, and boots, to shield your skin from mold spores. A high-quality respirator with a P100 filter is essential to protect your lungs from inhaling harmful particles.
Don’t forget gloves; nitrile or rubber options are best for preventing skin contact with mold. Safety goggles will safeguard your eyes from irritation.
Make certain all your safety equipment fits properly to provide maximum protection.
Assess Structural Stability
Before diving into mold remediation, you must assess the structural stability of the affected area.
Start with a thorough foundation inspection to identify any damage that could compromise safety. Look for cracks, shifting, or other signs of instability.
If you notice significant issues, it’s essential to halt your efforts and consult a professional for structural repairs. Addressing these concerns safeguards your safety and prevents further damage to your property.
Remember, mold can thrive in unstable environments. Prioritizing structural integrity creates a safer space for you and your loved ones, enabling effective mold remediation later.
Always take the time to evaluate before proceeding; it’s a vital step in protecting both yourself and your home.
Evacuate If Necessary
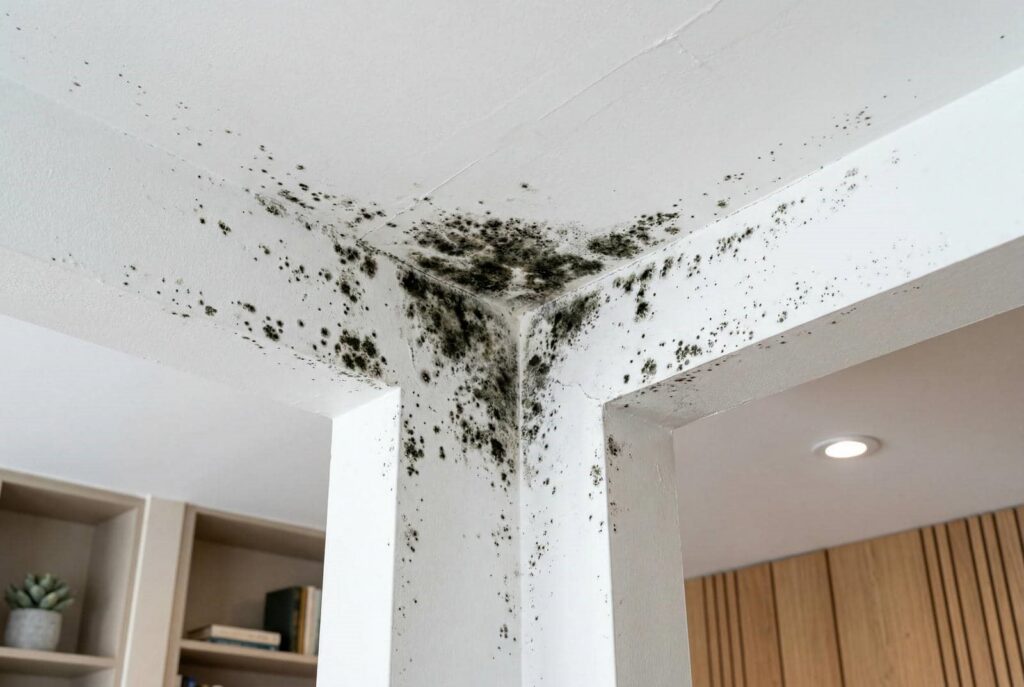
Although you might be enthusiastic to tackle mold remediation, evacuating the affected area is essential if you notice significant mold growth or experience adverse health effects.
Mold can release harmful spores, jeopardizing your health, especially if you have allergies or respiratory issues. Before entering a contaminated space, familiarize yourself with evacuation procedures and verify your emergency contacts are readily accessible.
Prioritize your safety and that of your loved ones; don’t hesitate to leave if conditions worsen. Once safely evacuated, document the situation for future reference and alert professionals for remediation.
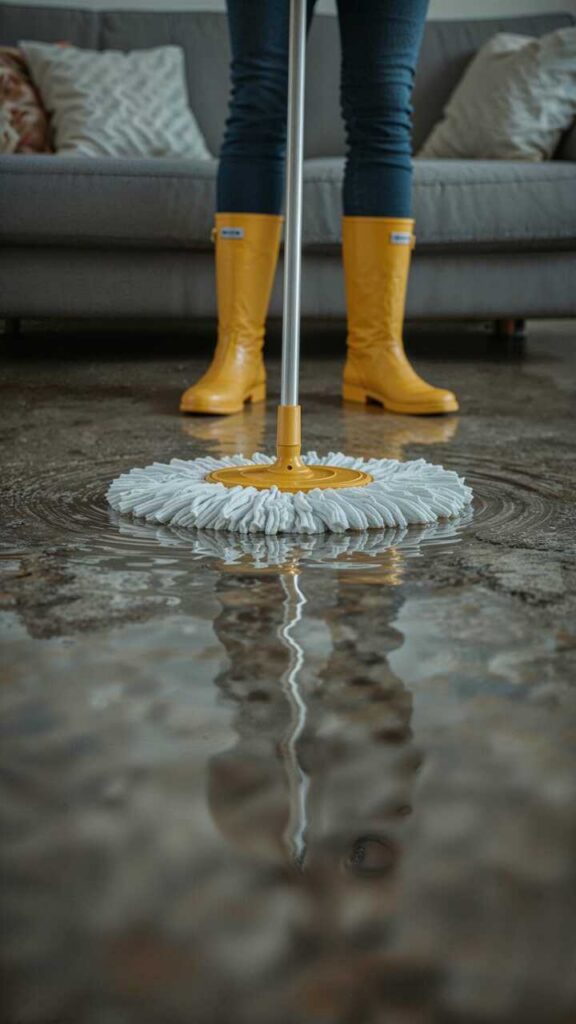
Quickly Remove Standing Water
To effectively combat mold growth, you need to quickly remove any standing water.
Start by evaluating the water levels to determine the best approach, then use pumps to extract the water efficiently.
Finally, ensure proper drainage points are clear to prevent future accumulation.
Assess Water Levels First
When you face water damage, quickly evaluating water levels is essential for effective mold remediation.
Begin with a thorough water level assessment to understand the extent of the flood damage. Identify areas with standing water, noting the depth and spread, as this will guide your next steps.
Use a measuring tool to gauge the height of the water; this precise data helps determine the urgency of removal efforts. Document your findings, as a clear flood damage evaluation will assist professionals if further assistance is needed.
Acting swiftly minimizes mold growth and promotes a safer environment for you and your family.
Use Pumps Effectively
After evaluating the water levels, you need to act quickly to remove standing water. Choosing the right pump types is essential. Submersible pumps are ideal for deep water, while transfer pumps work well for shallower areas.
Before you start, check your pump maintenance; verify all components are functioning properly to avoid breakdowns during use. Once operational, position the pump at the lowest point of standing water to maximize efficiency.
Regularly monitor the water levels, adjusting the pump as necessary. Don’t forget to create a safe distance from electrical outlets to prevent hazards.
With the right approach, you’ll effectively clear the area and minimize mold growth, fostering a safer environment for you and your family.
Ensure Proper Drainage Points
Ensuring proper drainage points is essential for effectively removing standing water and preventing mold growth. Start by evaluating your drainage systems to identify any blockages or inefficiencies. Clear debris from gutters and downspouts, and make sure they direct water away from your property.
Utilize portable pumps to remove excess water quickly, especially in low-lying areas where it tends to accumulate.
Implementing a solid water management plan can also help prevent future flooding. Consider grading your landscape to promote proper runoff and installing French drains or swales to redirect water.
Regular maintenance of these systems is key to ensuring they function effectively. By taking these steps, you’ll create a safer environment that minimizes the risk of mold infestation.
Best Practices for Drying Out Your Property
To effectively dry out your property and prevent mold growth, start by removing any standing water immediately. Use pumps or wet vacuums for efficient extraction.
Once the water’s gone, focus on ventilation techniques; open windows and doors to enhance air circulation. You can also use fans to accelerate the drying process. Deploy drying equipment, such as dehumidifiers, to reduce humidity levels further.
Monitor moisture with a hygrometer to ensure levels drop below 60%. Inspect hidden areas like walls and under carpets, as moisture can linger there.
Prioritize drying within the first 24-48 hours to minimize mold risks. By following these practices, you’ll create a safer environment for you and your family, fostering a sense of belonging and security.
How to Use Dehumidifiers for Effective Drying
Once you’ve removed standing water and improved ventilation, using dehumidifiers becomes a key step in the drying process.
Start by determining ideal dehumidifier placement; situate units in areas with the highest moisture levels, like basements or affected rooms.
Aim for a consistent airflow by keeping doors open and avoiding obstructions.
Monitor humidity control by checking levels regularly; ideally, indoor humidity should be below 60%.
Run dehumidifiers continuously until surfaces feel dry to the touch and humidity levels stabilize.
This proactive approach accelerates drying and helps prevent mold growth.
Remember to empty the water reservoir frequently or use a continuous drainage option for efficiency.
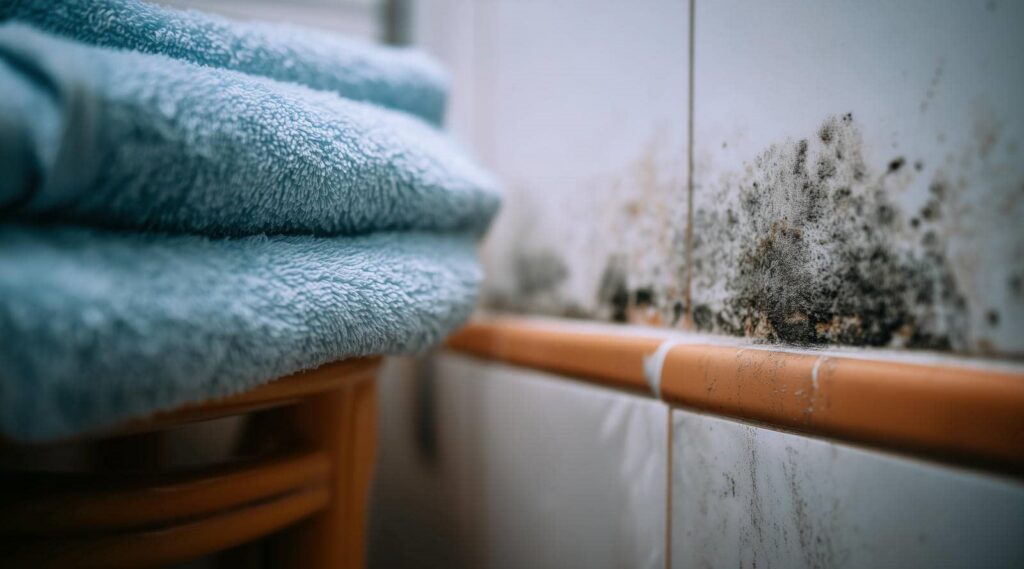
Mold Remediation: Clean and Disinfect Surfaces
Begin the cleaning and disinfecting process by focusing on affected surfaces to eliminate mold spores effectively.
Start with surface cleaning using a mixture of water and a suitable detergent. Scrub the areas thoroughly to remove visible mold growth.
For non-porous surfaces, a solution of water and bleach can be effective; however, ensure proper ventilation while using it.
After cleaning, apply a disinfectant specifically designed to kill mold spores.
Don’t forget to wear protective gear, like gloves and masks, to keep yourself safe during the process.
Once you’ve cleaned and disinfected, monitor the area for any signs of recurring mold. Regular inspections will help maintain a mold-free environment and confirm your space feels safe and welcoming.
Contain Mold Spread Before Cleaning
Before you start cleaning, it’s vital to contain the spread of mold to prevent it from affecting other areas. Implementing effective mold containment strategies is significant in this process.
First, seal off affected areas using plastic sheeting to create a barrier. This minimizes airflow and keeps spores from spreading.
Next, use negative air pressure by placing fans in windows to direct contaminated air outside. Make sure you wear proper protective gear, including masks and gloves, to safeguard yourself.
Additionally, conduct thorough inspections to identify hidden mold sources. By taking these preventative measures, you protect your health and streamline the cleaning process.
Containing mold effectively sets the stage for successful remediation and helps restore your space safely.
Apply Mold Inhibitors to Prevent Future Growth
Applying mold inhibitors is essential for preventing future growth after remediation efforts. These substances work by creating an environment that’s hostile to mold, effectively reducing the chances of re-infestation.
To maximize their effectiveness, integrate mold prevention techniques into your cleaning routine. Choose inhibitors that suit your specific surfaces and materials.
For long-term maintenance, apply these products periodically, especially in high-humidity areas like bathrooms and basements. Make sure that your home remains well-ventilated, as stagnant air can foster mold growth despite inhibitors.
Regularly inspect areas prone to moisture, and don’t hesitate to reapply inhibitors as needed. By taking these proactive steps, you’ll create a safer, healthier living environment for you and your family.
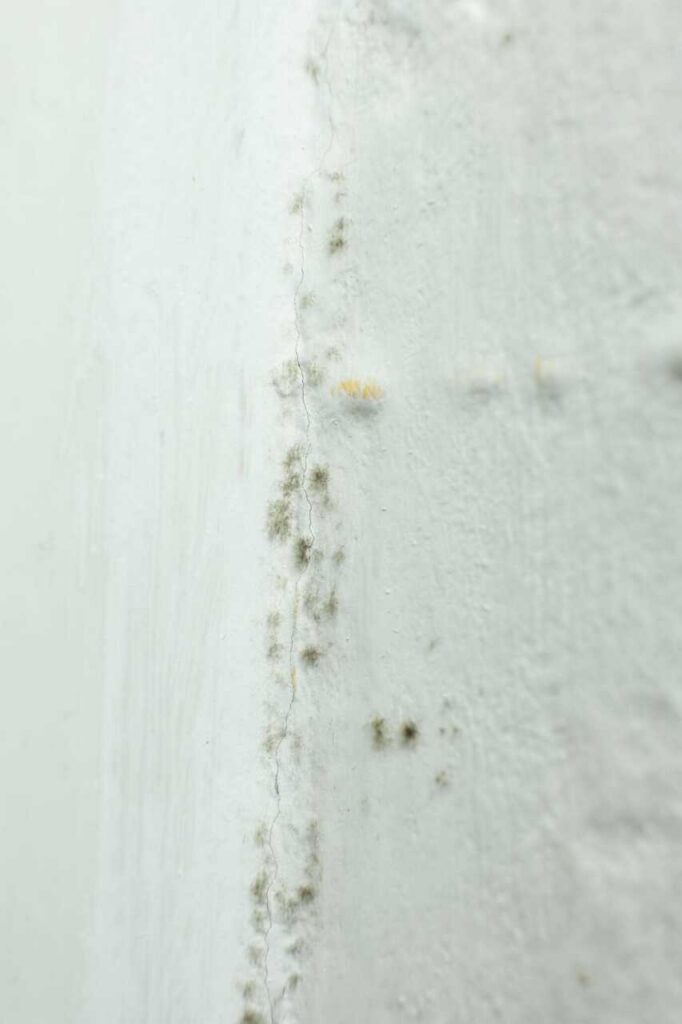
Keep an Eye Out for Mold After Cleanup
After cleanup, it’s vital to conduct regular inspections for any signs of mold resurgence.
Keep a close watch on humidity levels, as elevated moisture can trigger new growth.
Staying vigilant helps ensure that your efforts in mold remediation remain effective long-term.
Regular Inspections Are Essential
This practice is a critical aspect of preventive maintenance, ensuring that any moisture issues are addressed promptly. Check areas prone to dampness, like basements and crawl spaces, and don’t overlook hidden spots behind walls or under carpets.
Document your findings and take immediate action if you spot mold, using appropriate remediation techniques. By prioritizing these inspections, you protect your property and foster a sense of community responsibility, helping to promote a healthier environment for everyone involved.
Regular vigilance can make all the difference.
Monitor Humidity Levels Closely
To effectively prevent mold growth after cleanup, you must monitor humidity levels closely. Maintaining proper humidity control is essential in your efforts to keep your space mold-free.
Ideally, indoor humidity should be between 30% and 60%. Use a hygrometer for accurate moisture monitoring, allowing you to track fluctuations in humidity. If levels exceed this range, consider using dehumidifiers or improving ventilation to reduce excess moisture.
Regularly check areas prone to dampness, such as basements and bathrooms, as they’re often breeding grounds for mold.
When to Call Professionals for Mold Remediation
While some minor mold issues can be managed with DIY solutions, knowing when to call in professionals for mold remediation is vital for ensuring your home’s safety.
Here are key indicators that warrant a professional evaluation:
Extensive Mold Growth: If you see mold covering more than 10 square feet, it’s time to reach out.
Persistent Odors: A musty smell that lingers despite cleaning may signal hidden mold.
Water Damage: If you’ve experienced flooding or significant leaks, a thorough inspection is paramount.
Health Concerns: If you or your family members experience respiratory issues, professional help is necessary to assess mold exposure risks.
Don’t hesitate—addressing mold problems promptly can safeguard your home and well-being.
Frequently Asked Questions
How Long Does It Take for Mold to Develop After Flooding?
Mold can develop within 24 to 48 hours after flood damage if moisture control isn’t implemented. Promptly addressing damp areas and using dehumidifiers helps prevent mold growth, protecting your home and health effectively.
Can I Use Bleach to Kill Mold Effectively?
Sure, you can use bleach, but it’s not a magic potion. While it kills surface mold, it doesn’t penetrate porous materials. Mold spores laugh at bleach effectiveness, so consider professional help for lasting results.
What Types of Mold Are Most Commonly Found After Flooding?
After flooding, you’ll commonly find Stachybotrys, Aspergillus, and Penicillium molds. Identifying these types is essential, as they pose significant health risks. Understanding their characteristics helps you act swiftly to mitigate exposure and protect your environment.
Are There Any DIY Mold Removal Methods That Work?
Why settle for store-bought chemicals when natural remedies offer effective solutions? You can use vinegar, baking soda, or hydrogen peroxide to tackle mold. Just remember to ventilate the area and wear protective gear while working.
How Can I Prevent Mold Growth in the Future?
To prevent mold growth, implement effective ventilation strategies and maintain moisture control. Regularly inspect areas prone to dampness, use dehumidifiers, and ensure proper air circulation to create an environment mold can’t thrive in.
Summary
In the aftermath of flooding, swift action can mean the difference between a safe home and a mold-infested nightmare. While standing water invites danger, prompt removal secures your space. As you dry and clean, don’t underestimate the power of mold inhibitors; they’re your first line of defense against future growth. Keep vigilant, inspecting regularly. If the problem escalates, remember: sometimes, calling in professionals is the best choice for reclaiming your environment and ensuring long-term safety.